Kinder’s Garlic Butter Shrimp
Kinder’s Garlic Butter Shrimp
One baking dish. One pound of shrimp. Kinder’s Garlic Butter Seasoning and a full stick of unsalted butter. That is the whole setup, and what comes out of the oven is a pool of herb-scented, deeply garlicky butter sauce with perfectly cooked shrimp.
Garlic butter is the shortest route to a good shrimp and the easiest way to overcook one, so keep the pan moving. The whole shrimp lineup runs on that same margin.
Pack the shrimp into an oven-safe dish in a tight single layer, dust them with Kinder’s Garlic Butter Seasoning, and lay twelve pats of butter across the top with lemon slices and fresh rosemary. Bake at 350°F for 10–15 minutes. The butter melts down and mingles with the seasoning and lemon, building a sauce while the shrimp cook through in the middle of it. Pull it out of the oven and it looks like something from a restaurant order.
Garlic Butter Seasoning is responsible for most of what you taste. It’s a roasted garlic and butter blend that blooms directly into the melting butter as the dish bakes, seasoning the shrimp from the outside while building the sauce from the inside. That’s why the sauce hits different than anything you’d make with raw garlic and butter separately. One tablespoon handles what would normally take five minutes of prep and a hot pan.
The details that matter: use U-25 or larger shrimp, smaller ones overcook before the butter finishes melting. Pack them tight so they stay submerged in the sauce. Don’t leave the oven unattended. Shrimp cross from perfectly cooked to rubbery in about two minutes.
Total time is 35 minutes. Serves four over pasta or two as a generous starter with crusty bread. Scale to a 9×13 with 2 lbs of shrimp for a party, same formula, five more minutes.
Flavor First.
Garlic Butter Shrimp
Ingredients
Equipment
Method
- Preheat oven to 350 degrees F.
- Arrange peeled shrimp in the baking dish in a single layer, all facing the same direction and packed tightly without overlapping. A snug arrangement helps them cook evenly and keeps them bathed in the butter sauce as it melts.
- Sprinkle Kinder’s Garlic Butter Seasoning evenly over the shrimp.
- Distribute the butter pats evenly across the dish. Tuck lemon slices and rosemary sprigs around and between the shrimp.
- Bake for 10-15 minutes until shrimp are pink, curled, and cooked through. If using a thermometer, the internal temperature should reach 145 degrees F. Do not overbake — shrimp become rubbery very quickly past doneness.
- Serve immediately directly from the baking dish. The melted butter in the dish is the sauce — spoon it over everything.
Nutrition
Notes
- Size matters here — U-25 or larger shrimp give the butter time to fully melt and season before the shrimp overcook. Anything smaller and you’re racing the clock.
- Pack the dish tight — shrimp in a snug single layer cook evenly and stay submerged in the butter sauce as it pools. Space them out and the edges dry before the center finishes.
- Start checking at 10 minutes — pink, curled, and opaque is done. Shrimp go rubbery fast past that point. Pull them the moment they look right.
- The sauce is half the dish — have crusty bread ready to soak up the garlic butter that pools in the pan. This is not the side to skip.
- Scaling up is straightforward — move to a 9×13 pan, double the shrimp and all other ingredients, and add 3–5 minutes to the cook time.
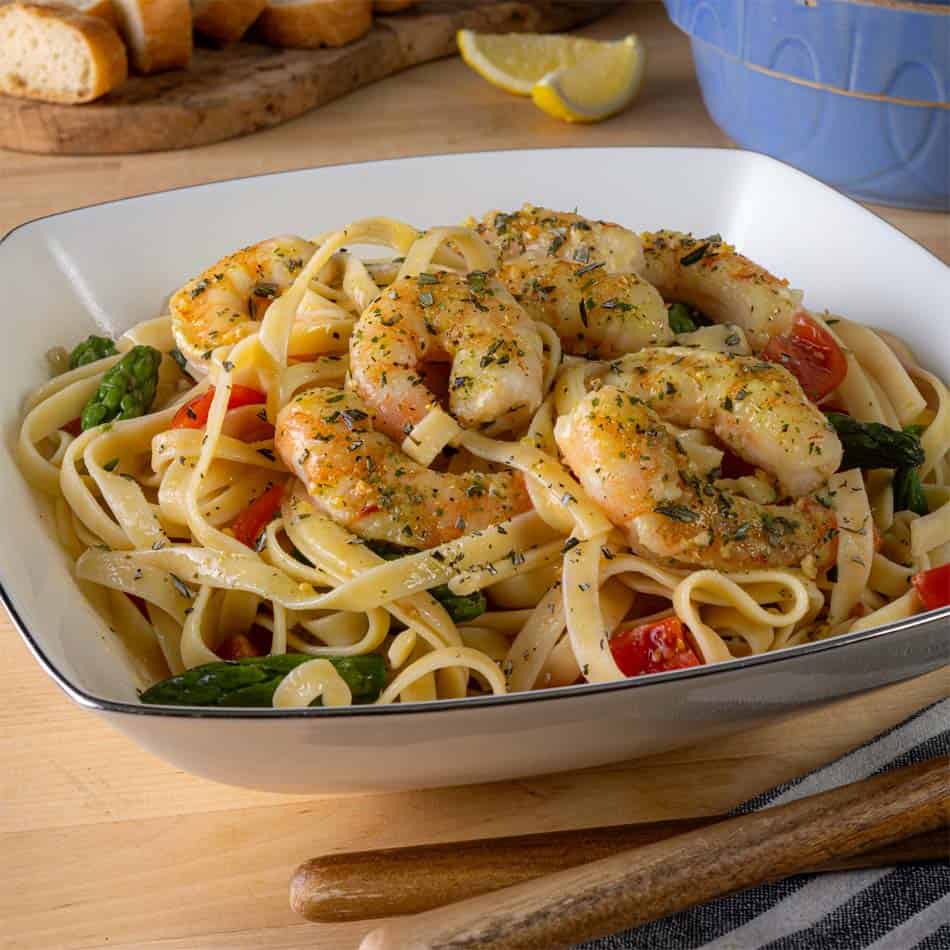
- Toss linguine or angel hair with the pan sauce and a handful of chopped parsley — the garlic butter coats the pasta like a proper sauce, no additions needed. A squeeze of extra lemon over the top cuts the richness.
- Crusty sourdough or ciabatta next to the dish is practically mandatory. The butter that pools in the pan is the best part of the whole thing, and bread is the right tool for it.
- For a lighter plate, serve alongside roasted asparagus, steamed broccoli, or a simple green salad. The shrimp and sauce are rich enough that a clean vegetable brings balance without competing.
- Scale to a 9×13 pan with 2 lbs of shrimp and set it in the center of the table with baguette slices and cocktail picks. It holds its own as a party centerpiece.
- Refrigerate leftovers in an airtight container for up to 2 days. Shrimp is best eaten the day it’s made — the texture tightens as it sits.
- To reheat, warm gently in a covered skillet over low heat with a splash of white wine or lemon juice, just until heated through. Microwaving will toughen the shrimp.
- Cold leftover shrimp works well added to pasta salad or a grain bowl with a drizzle of olive oil. No reheating required, and it holds up cleanly cold.
Tried this recipe?
Let us know how it was!Frequently Asked Questions
Should I use tail-on or tail-off shrimp?
Either works. Tail-on looks better in the dish and gives you something to hold when eating it as a starter. Tail-off is more practical over pasta or in a grain bowl. The recipe works the same either way.
Can I use frozen shrimp?
Yes, but thaw completely and pat dry before baking. Frozen shrimp releases water as it cooks, which dilutes the butter sauce and extends the cook time. Thawed and dried shrimp bakes cleanly.
Can I make this on the stovetop instead of the oven?
Yes. Melt the butter in a large skillet over medium heat, add the seasoning, then add the shrimp. Cook 2–3 minutes per side until pink and cooked through. Add lemon juice and rosemary at the end. Faster method, slightly different texture on the shrimp.
What pasta works best with garlic butter shrimp?
Linguine or angel hair. Both are thin enough to coat in the butter sauce without overwhelming the shrimp. Toss the pasta directly with the pan sauce, no cream or extra butter needed.
Can I use salted butter?
You can, but go light on the Kinder’s seasoning if you do. The blend already has sodium, and combining it with salted butter can push the salt level higher than intended. Unsalted butter gives you better control.
How do I know when the shrimp are done?
Pink exterior, curled into a C-shape, and opaque throughout. If they’re curled into a tight O-shape, they’re overcooked. Start checking at the 10-minute mark and pull them as soon as they hit that C-shape.
More like this: Fish & Seafood Recipes · Game Day Recipes · Kinder’s Recipes
One Good Recipe a Week
No spam, no life stories. A recipe worth cooking, in your inbox.