Keto Cheese Shell Tacos with Seasoned Beef
Keto Cheese Shell Tacos with Seasoned Beef
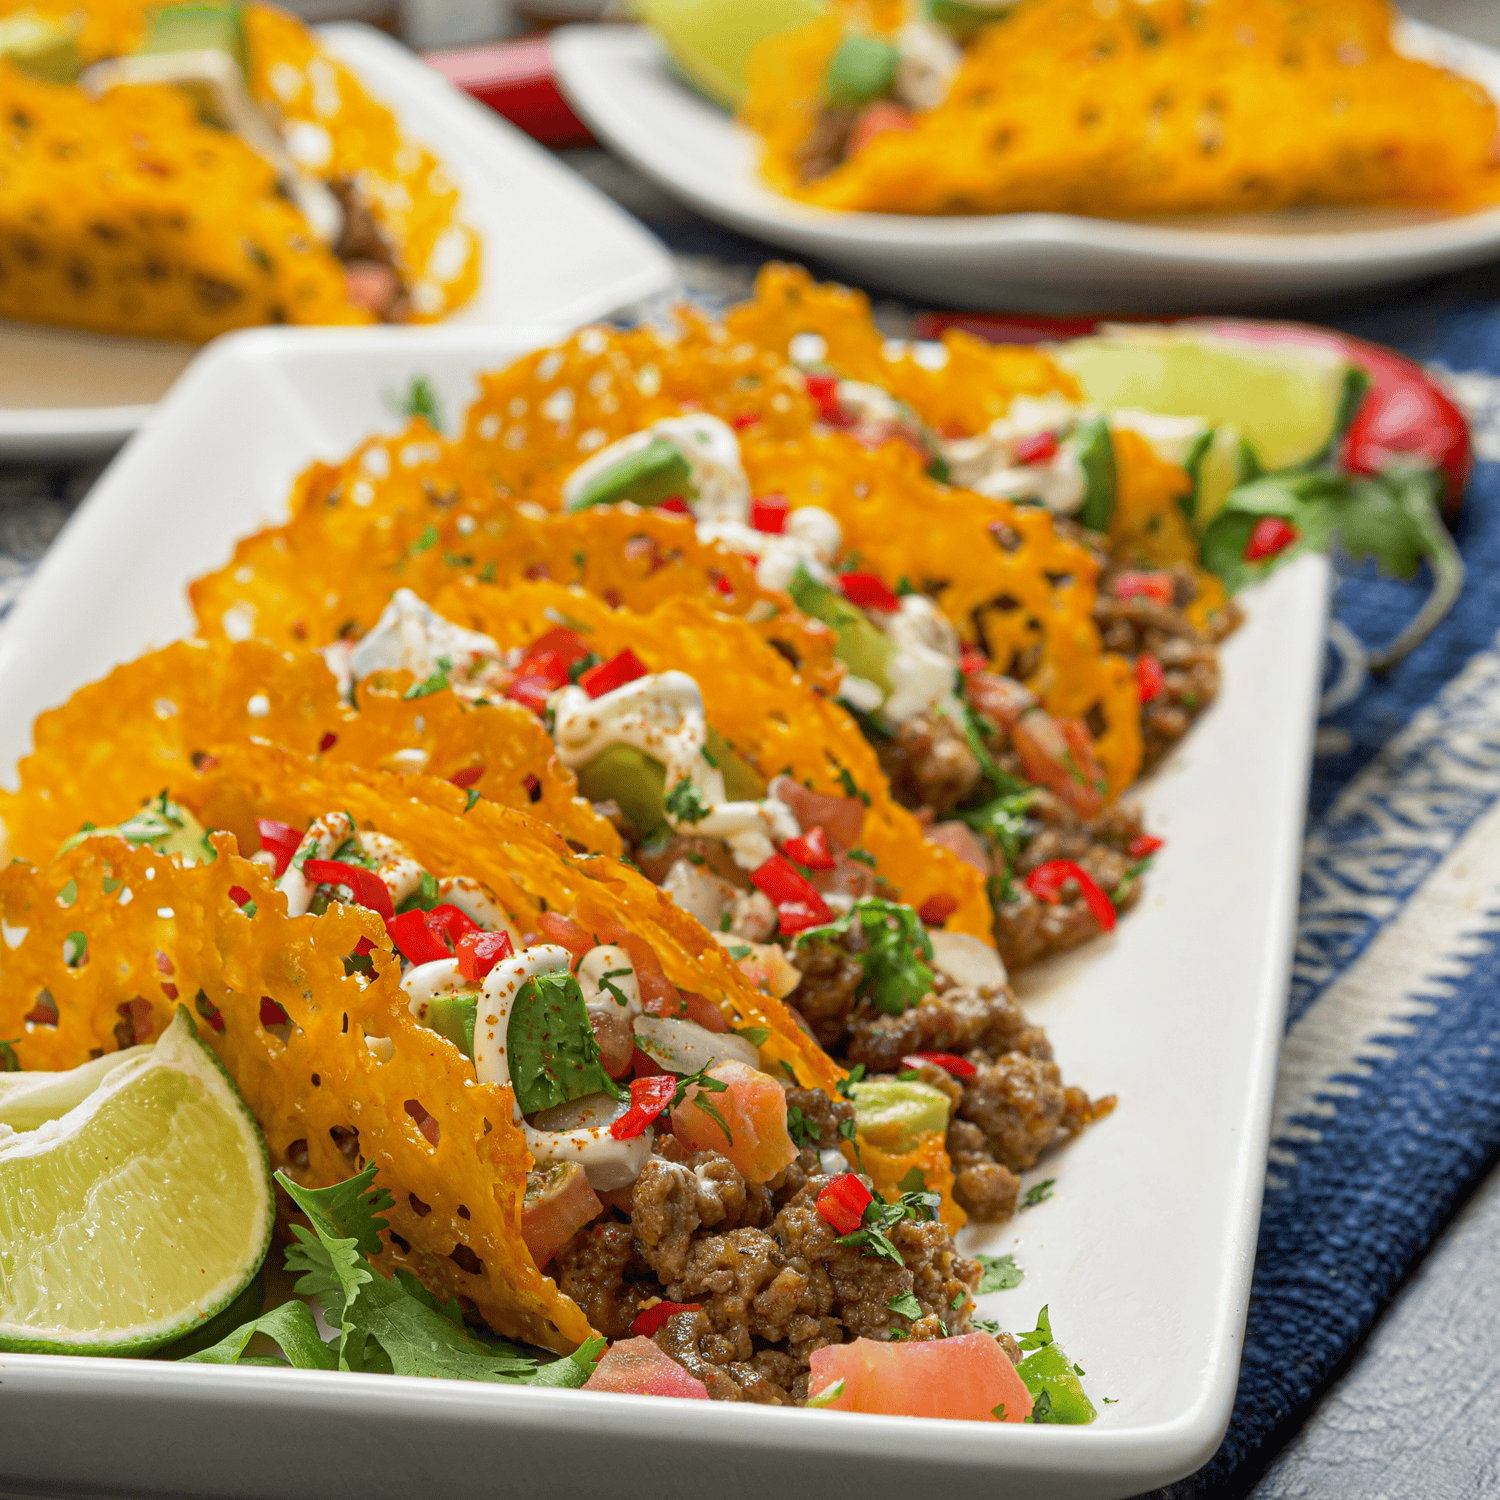
Stop buying taco shells. The best shell you can put under seasoned beef is one made entirely out of sharp cheddar, baked flat, draped over a wooden spoon bridge while it’s still warm, and left to crisp into a rigid, salty shell with a snap that flour tortillas can’t touch.
The cheese-shell structure is specific to this recipe, but the filling approach carries over to every other taco recipes variant on the site.
Keto cheese shell tacos are built around one technique: timing the bake window. The cheese needs 5-7 minutes at 375°F, melted and bubbly with just a hint of color at the edges. Pull it too early and it tears when you mold it. Leave it too long and it browns brittle. Hit the window and you get a shell that holds seasoned beef, fresh tomatoes, diced avocado, and sour cream without folding.
These tacos hit a different texture register than anything wrapped in flour. The shell shatters at the first bite, salty, slightly crisp, and dense enough to support a full load of toppings. Taco night keeps circling back to these.
The beef is straightforward: brown it hard, drain it, then simmer with taco seasoning, lime juice, and a splash of water until the sauce clings to every piece. Sharp cheddar underneath, bold seasoned beef on top, fresh toppings over that. No flour. Under 4g net carbs per taco.
Set up the wooden spoon bridge before the cheese comes out of the oven. The window from baking sheet to taco shape is about 60 seconds. Work fast, and the shell sets exactly where you want it.
Flavor First.
Keto Cheese Shell Tacos with Seasoned Beef
Ingredients
Equipment
Method
- Preheat oven to 375°F.
- Line a baking sheet with parchment paper or a silicone baking mat.
- Place 1/3-cup mounds of shredded cheddar cheese on the lined baking sheet, spacing them about 2 inches apart (you should fit 4 mounds per sheet for 8 tacos total).
- Using the back of a spoon, gently spread each mound of cheese into a thin, relatively uniform circle about 4-5 inches in diameter.
- Bake for 5-7 minutes, watching closely. The cheese should be melted, bubbly, and just beginning to turn slightly golden around the edges. Don’t allow it to brown too much or turn dark.
- Remove from oven and let the cheese cool on the baking sheet for 30 seconds to 1 minute—it should still be warm and slightly pliable but firm enough to move without tearing.
- Set up a taco-forming station: place two small glasses or bowls upside down on your counter with a wooden spoon laid across the top as a bridge.
- Using a spatula or thin metal turner, carefully transfer each hot cheese disc to the wooden spoon bridge, draping it over the spoon to form a taco shell shape. The sides will naturally fold down as the cheese cools.
- Let the cheese shells cool completely (about 5 minutes) before removing them carefully from the bridge. They’ll crisp up as they cool.
- Repeat the baking and forming process with the remaining cheese mounds if you want to make all 8 tacos fresh, or work in batches.
- While the cheese shells are forming, brown the ground beef in a large skillet over medium-high heat, breaking it apart with a spoon as it cooks (about 5-7 minutes).
- Drain any excess fat from the skillet.
- Add the taco seasoning, lime juice, and water to the cooked beef and stir well to combine.
- Simmer for 5 minutes, stirring occasionally, until the sauce reduces slightly and coats the beef.
- Taste and adjust seasonings as needed.
- To assemble tacos, fill each cheese shell with the warm seasoned beef.
- Top with fresh diced tomatoes, red onion, avocado, and sour cream.
- Garnish with fresh cilantro and chili pepper slices if desired.
- Serve immediately while the cheese shells are still slightly warm and crispy.
Nutrition
Notes
- Time the bake window — Pull the cheese at 5-7 minutes. Melted and bubbly, barely golden at the edges. Past that point the shell cracks when you mold it.
- Pre-stage the bridge — Two small glasses upside down with a wooden spoon laid across the top. Set this up before the cheese goes in the oven so you’re not scrambling when the timer hits.
- Blot before you mold — Lay a paper towel on the hot cheese disc for 2-3 seconds to pull excess grease before transferring to the spoon. Less grease, cleaner crisp.
- Cool completely — Five minutes on the bridge, untouched. Pulling them early collapses the shape.
- Make shells ahead — Finished shells keep at room temperature in an airtight container for 2-3 hours. Don’t refrigerate — moisture kills the crisp.
- Season the cheese — A pinch of chili powder or cumin mixed into the shredded cheddar before baking adds a second hit of flavor that carries through every bite.
- Load the shells right before you eat. Warm seasoned beef goes in first, then diced tomatoes, red onion, and avocado, then a hit of sour cream and fresh cilantro. The contrast between hot beef and cold toppings is part of the play here.
- Cauliflower rice with lime zest and cilantro is the natural side — it fills the plate without adding carbs. Pico de gallo and guacamole on the side let people dip the shell edges between bites.
- For a group, run the shells in two baking-sheet batches before anyone sits down. Line them up on a board, keep the beef warm in the skillet on low, and let people build their own.
- Cheese shells are best eaten the day they’re made. Store unfilled shells in an airtight container at room temperature for up to 2-3 hours. Don’t refrigerate — moisture softens the shell fast and kills the crisp.
- The seasoned beef keeps well. Store it in the refrigerator, covered, for up to 3 days. Reheat in a skillet over medium heat with a small splash of water to loosen it up.
- Assembled tacos don’t store. The filling softens the shell quickly. Keep components separate and assemble fresh each time.
Tried this recipe?
Let us know how it was!Frequently Asked Questions
How do you make crispy keto cheese shell tacos?
Spread 1/3-cup mounds of shredded cheddar on a parchment-lined baking sheet and bake at 375°F for 5-7 minutes. While the cheese is still warm and pliable, drape each disc over a wooden spoon bridge to form the shell shape. Let cool 5 minutes until fully crisp.
What cheese works best for keto taco shells?
Sharp cheddar is the go-to, it melts evenly, crisps cleanly, and has enough flavor to hold up under bold fillings. Pre-shredded cheese has anti-caking agents that can affect the melt; shred from the block when you can.
Can I make the cheese shells ahead of time?
Yes. Unfilled shells keep at room temperature in an airtight container for 2-3 hours. Don’t refrigerate, moisture softens the shell fast. The seasoned beef can be made 1-2 days ahead and reheated in a skillet before assembling.
How many carbs are in keto cheese shell tacos?
Each taco has approximately 4g of carbohydrates. The shells themselves are virtually zero carb, all the carbs come from toppings like tomatoes, onion, and avocado. Adjust toppings to tighten the count further.
Can I cook the cheese shells on the stovetop instead of the oven?
You can. In a non-stick pan over medium heat, add shredded cheddar in a thin circle and cook until the edges look lacy and the center is fully melted, about 3-4 minutes. The oven method produces more consistent results when making multiple shells at once.
What taco seasoning works best for this recipe?
Any standard packet works. For lower sodium, use a reduced-sodium blend or mix your own: cumin, chili powder, garlic powder, dried oregano, and a pinch of cayenne.
More like this: Game Day Recipes · Kinder’s Recipes
One Good Recipe a Week
No spam, no life stories. A recipe worth cooking, in your inbox.