Blackened Chicken Fajita Skewers
Blackened Chicken Fajita Skewers
Blackened chicken fajita skewers come down to one move most people rush past: letting the rub actually work before the chicken hits the grill. Skip that step and you get seasoned chicken. Do it right and you get a crust.
Proof the vegetables get eaten when they share a skewer; a favorite from our grilling recipes set.
That 15-minute marinade is the difference. The rub, smoky, peppery, layered with dried herbs, grips the chicken and builds the crust that develops char and holds texture on the grates.
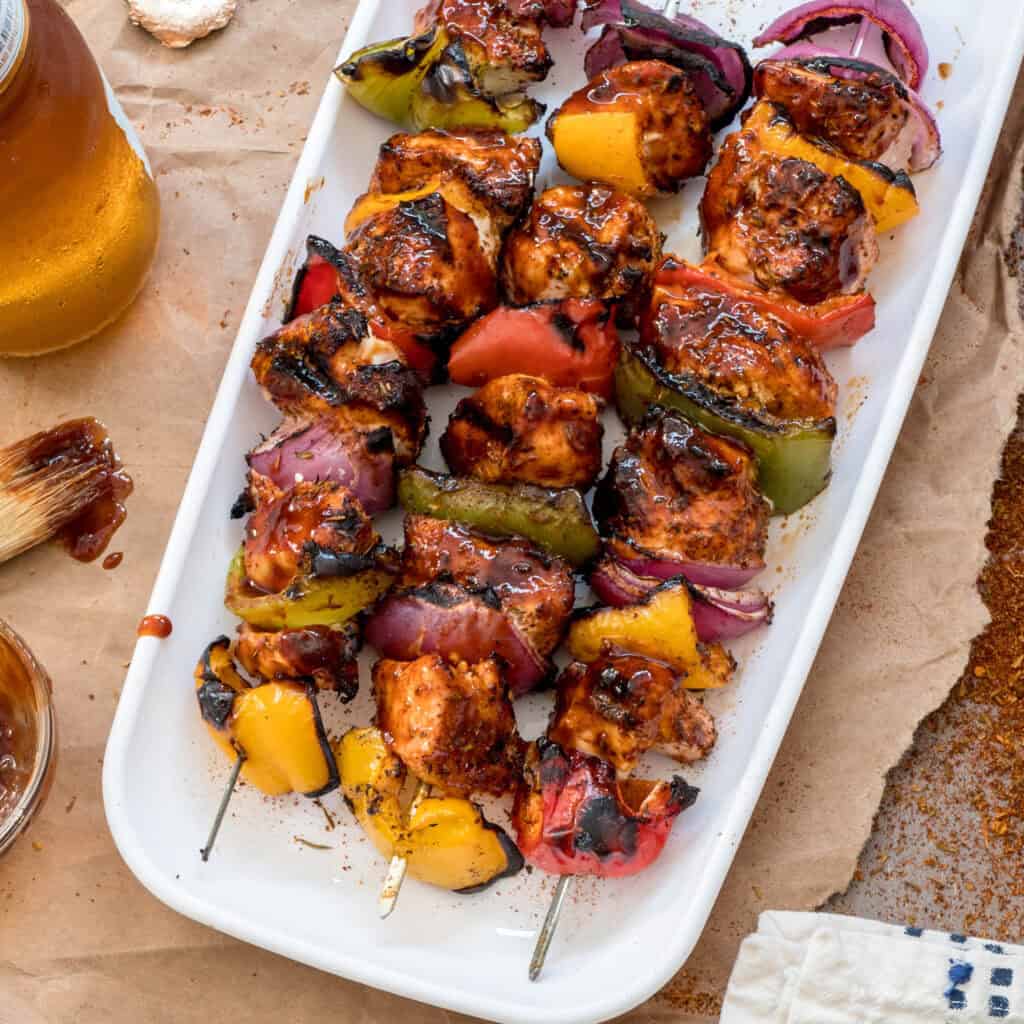
From there, this recipe is about sequencing. Cut everything to the same size, 1 to 1.5-inch cubes for the chicken, 1-inch for the peppers and onion. Thread them alternating on the skewer: chicken, pepper, onion, repeat. Every skewer gets the same ratio of protein and vegetable, which means even cooking and a full bite every time.
Preheat to 450°F. Place the skewers on the grates and leave them alone. Four to six minutes per side, one rotation, pull at 165°F internal temp. Rest for two minutes before serving.
Three bell peppers, red, yellow, green, plus red onion give you color and a slight sweetness that cuts through the deep char of the rub. The Kinder’s Cali Blackened Rub handles the smoky, peppery, herby seasoning without requiring you to stack a dozen spices on the counter. If you don’t have it, the ingredients list includes a substitution that covers the base profile closely, smoked paprika, onion powder, garlic powder, black pepper, dried herbs, and salt.
This recipe serves 4 and finishes in 35 minutes. Minimal prep, technique that reads in one pass, and enough visual presence to work on a weeknight or hold its own at a backyard cookout.
Flavor First.
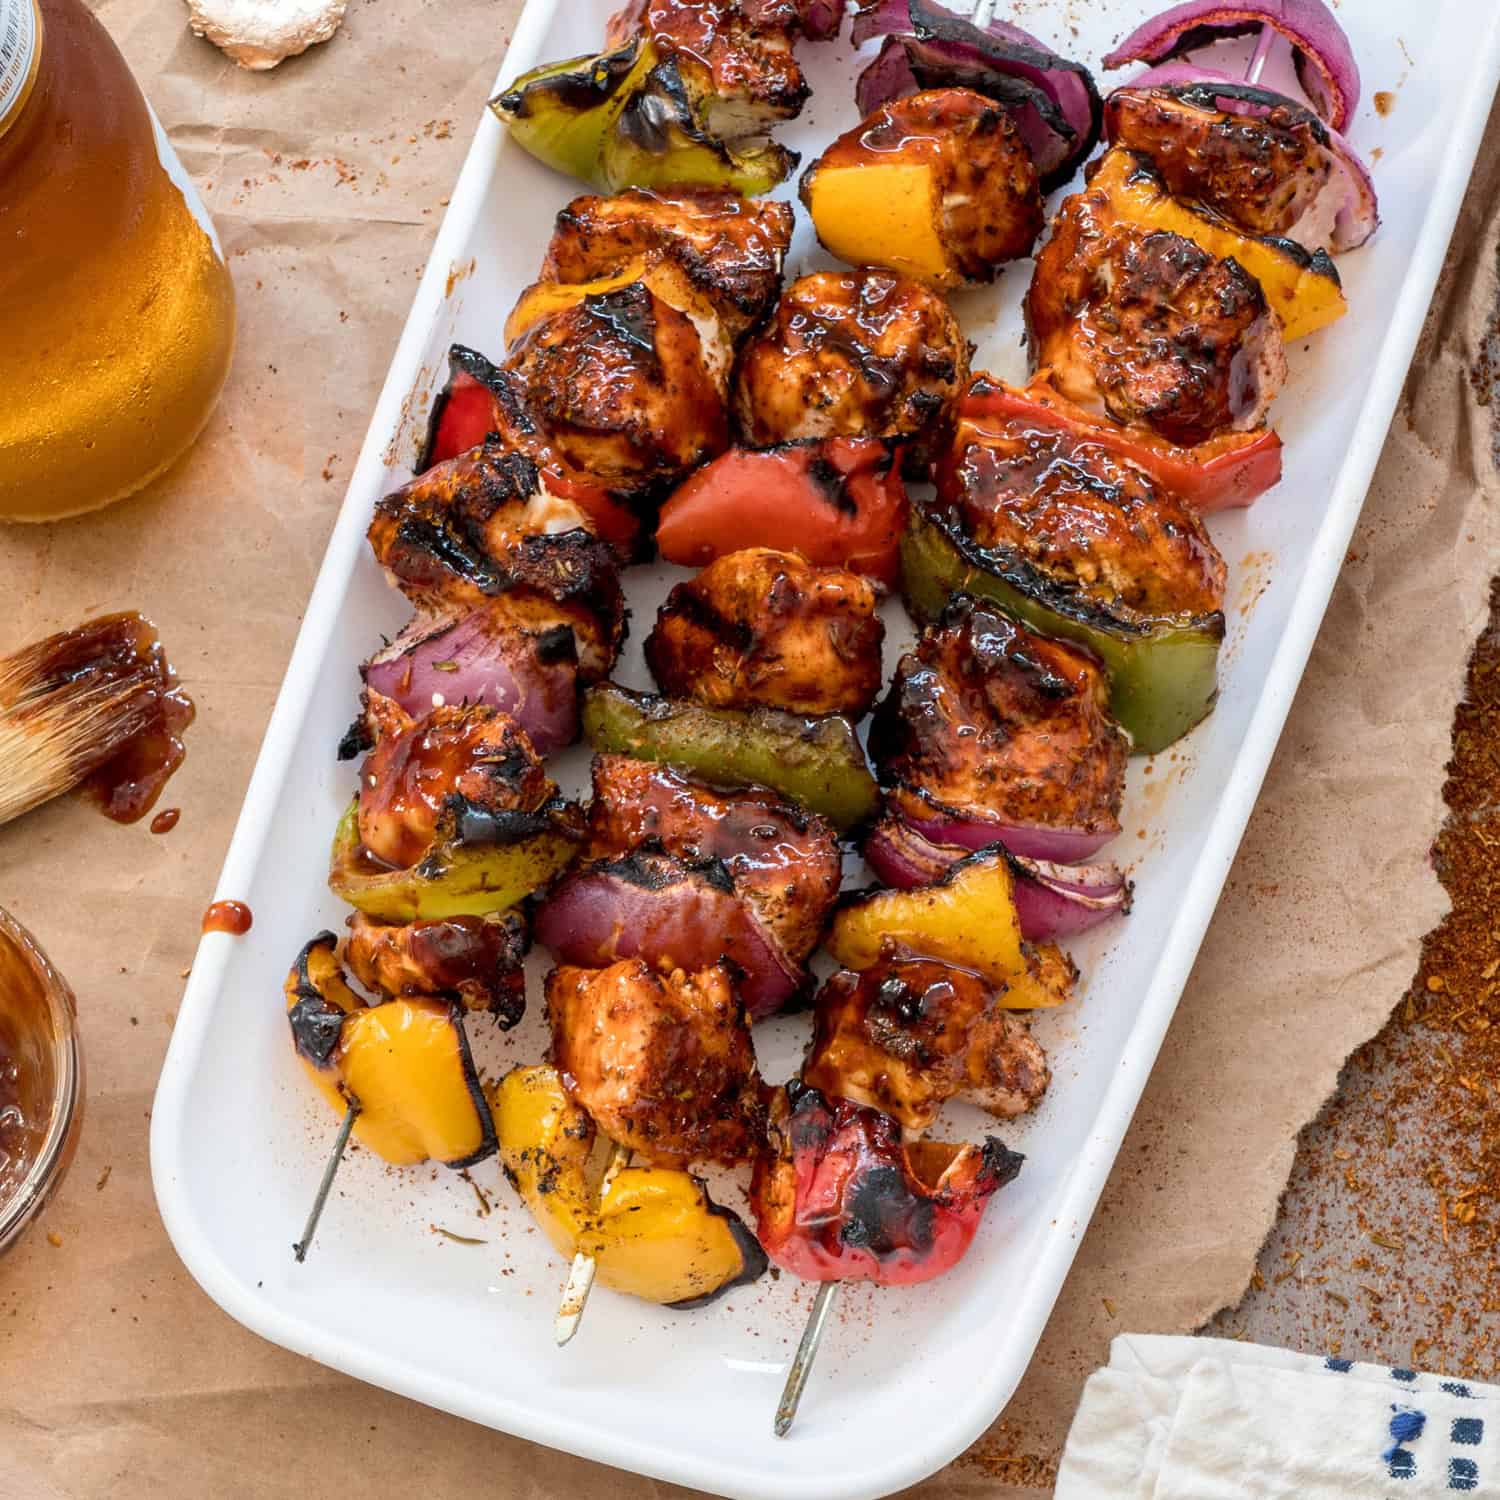
Blackened Chicken Fajita Skewers
Ingredients
Equipment
Method
- If using wooden skewers, soak them in water for at least 30 minutes to prevent burning.
- Cut chicken breast into 1–1.5″ cubes. In a mixing bowl, combine chicken cubes with olive oil and 2–3 tbsp of Kinder’s Cali Blackened Rub.
- Toss until chicken is evenly coated. Cover and refrigerate for 15–20 minutes to allow flavors to meld.
- While chicken marinates, cut bell peppers and red onion into 1″ cubes.
- Preheat grill or grill pan to 450°F.
- Thread chicken and vegetables onto skewers, alternating: chicken, pepper, onion, pepper, chicken, etc. Repeat until skewer is full.
- Place skewers directly on grill grates. Cook for 4–6 minutes per side, rotating halfway through, until chicken reaches an internal temperature of 165°F and vegetables are lightly charred.
- Remove skewers from heat. Let rest for 2 minutes before serving.
Nutrition
Notes
- Uniform cuts are non-negotiable — if chicken pieces vary in size, the small ones overcook while the large ones lag. Take the extra minute to cut consistently.
- Respect the marinade window — 15 minutes minimum in the fridge. The rub needs contact time to bind to the meat. Grilling too soon means seasoning that doesn’t stick.
- Soak wooden skewers completely — fully submerged for 30 minutes before threading. Damp on the outside isn’t enough; the tips will still char instead of the food.
- Set up a cooler grill zone — blackened rubs have fine seasoning particles that flare easily. Have a spot on the grill to move skewers off direct heat if flare-ups start.
- Lime right off the grill — a squeeze of fresh lime juice immediately after pulling the skewers lifts the whole flavor profile. Do it before plating, not at the table.
- Leave space between skewers — crowding traps steam and kills the crust. Give each skewer enough room for heat to circulate on all sides.
- Build-your-own fajita bowls are the natural move here. Set out warm flour or corn tortillas, sour cream, and fresh salsa. Pull the chicken and vegetables off the skewers directly into the tortillas and let people build their own.
- For a plated version, serve the skewers over cilantro-lime rice with black beans on the side. The rice catches any drippings from the rub and rounds out the plate without competing with the seasoning.
- For a spread, let the skewers cool fully, slice the chicken off, and plate everything on a board with pickled jalapeños and crumbled cotija. That setup holds for an hour and handles a bigger group without losing anything.
- Store cooked skewers in an airtight container in the fridge for up to 3 days. Reheat on a grill or grill pan over medium heat for 3–4 minutes, or in a 350°F oven for 5–7 minutes. Pull them out of the fridge 10 minutes before reheating — going straight from cold kills the texture. Skip the microwave; it steams the exterior and destroys the crust the rub built.
- Raw marinated skewers can be frozen for up to 1 month. Freeze flat on a sheet tray, then transfer to a bag once solid. Thaw in the fridge overnight before grilling.
Tried this recipe?
Let us know how it was!Frequently Asked Questions
Can I use chicken thighs instead of breast?
Absolutely. Dark meat stays juicier on high heat and has more margin for error. Add 2–3 minutes per side and still check for 165°F internal, the extra fat doesn’t change the target temp.
What if I don’t have a grill?
A grill pan over medium-high heat works. Preheat it fully before the skewers go in, 3–4 minutes, so you get actual char marks rather than steamed chicken. The crust and seasoning hold up; you just lose the smoke.
How do I know when the chicken is done?
Use an instant-read thermometer. Target 165°F at the thickest piece on the skewer. Blackened seasoning turns deep brown fast, so color alone will mislead you, the outside looks done well before the inside is.
Can I prep these ahead of time?
Yes. Marinate the chicken and cut the vegetables up to 24 hours ahead. Keep them separate in the fridge and thread the skewers right before grilling, pre-threaded skewers sitting overnight can make the vegetables soggy.
What other vegetables work on these skewers?
Zucchini, mushrooms, and cherry tomatoes all hold up at 450°F. Cut zucchini and mushrooms to the same 1-inch size as the peppers. Cherry tomatoes go on whole. Avoid anything with high water content that will steam instead of char.
Can I cook these in the oven?
Yes, broil on high with the rack in the top position, 5–6 minutes per side. You won’t get the same char, but the rub builds a crust under direct heat. Finish with a lime squeeze the same way.
More like this: Chicken Recipes · Summer Grilling Recipes
One Good Recipe a Week
No spam, no life stories. A recipe worth cooking, in your inbox.