Woodfired Chili Cheese Dog
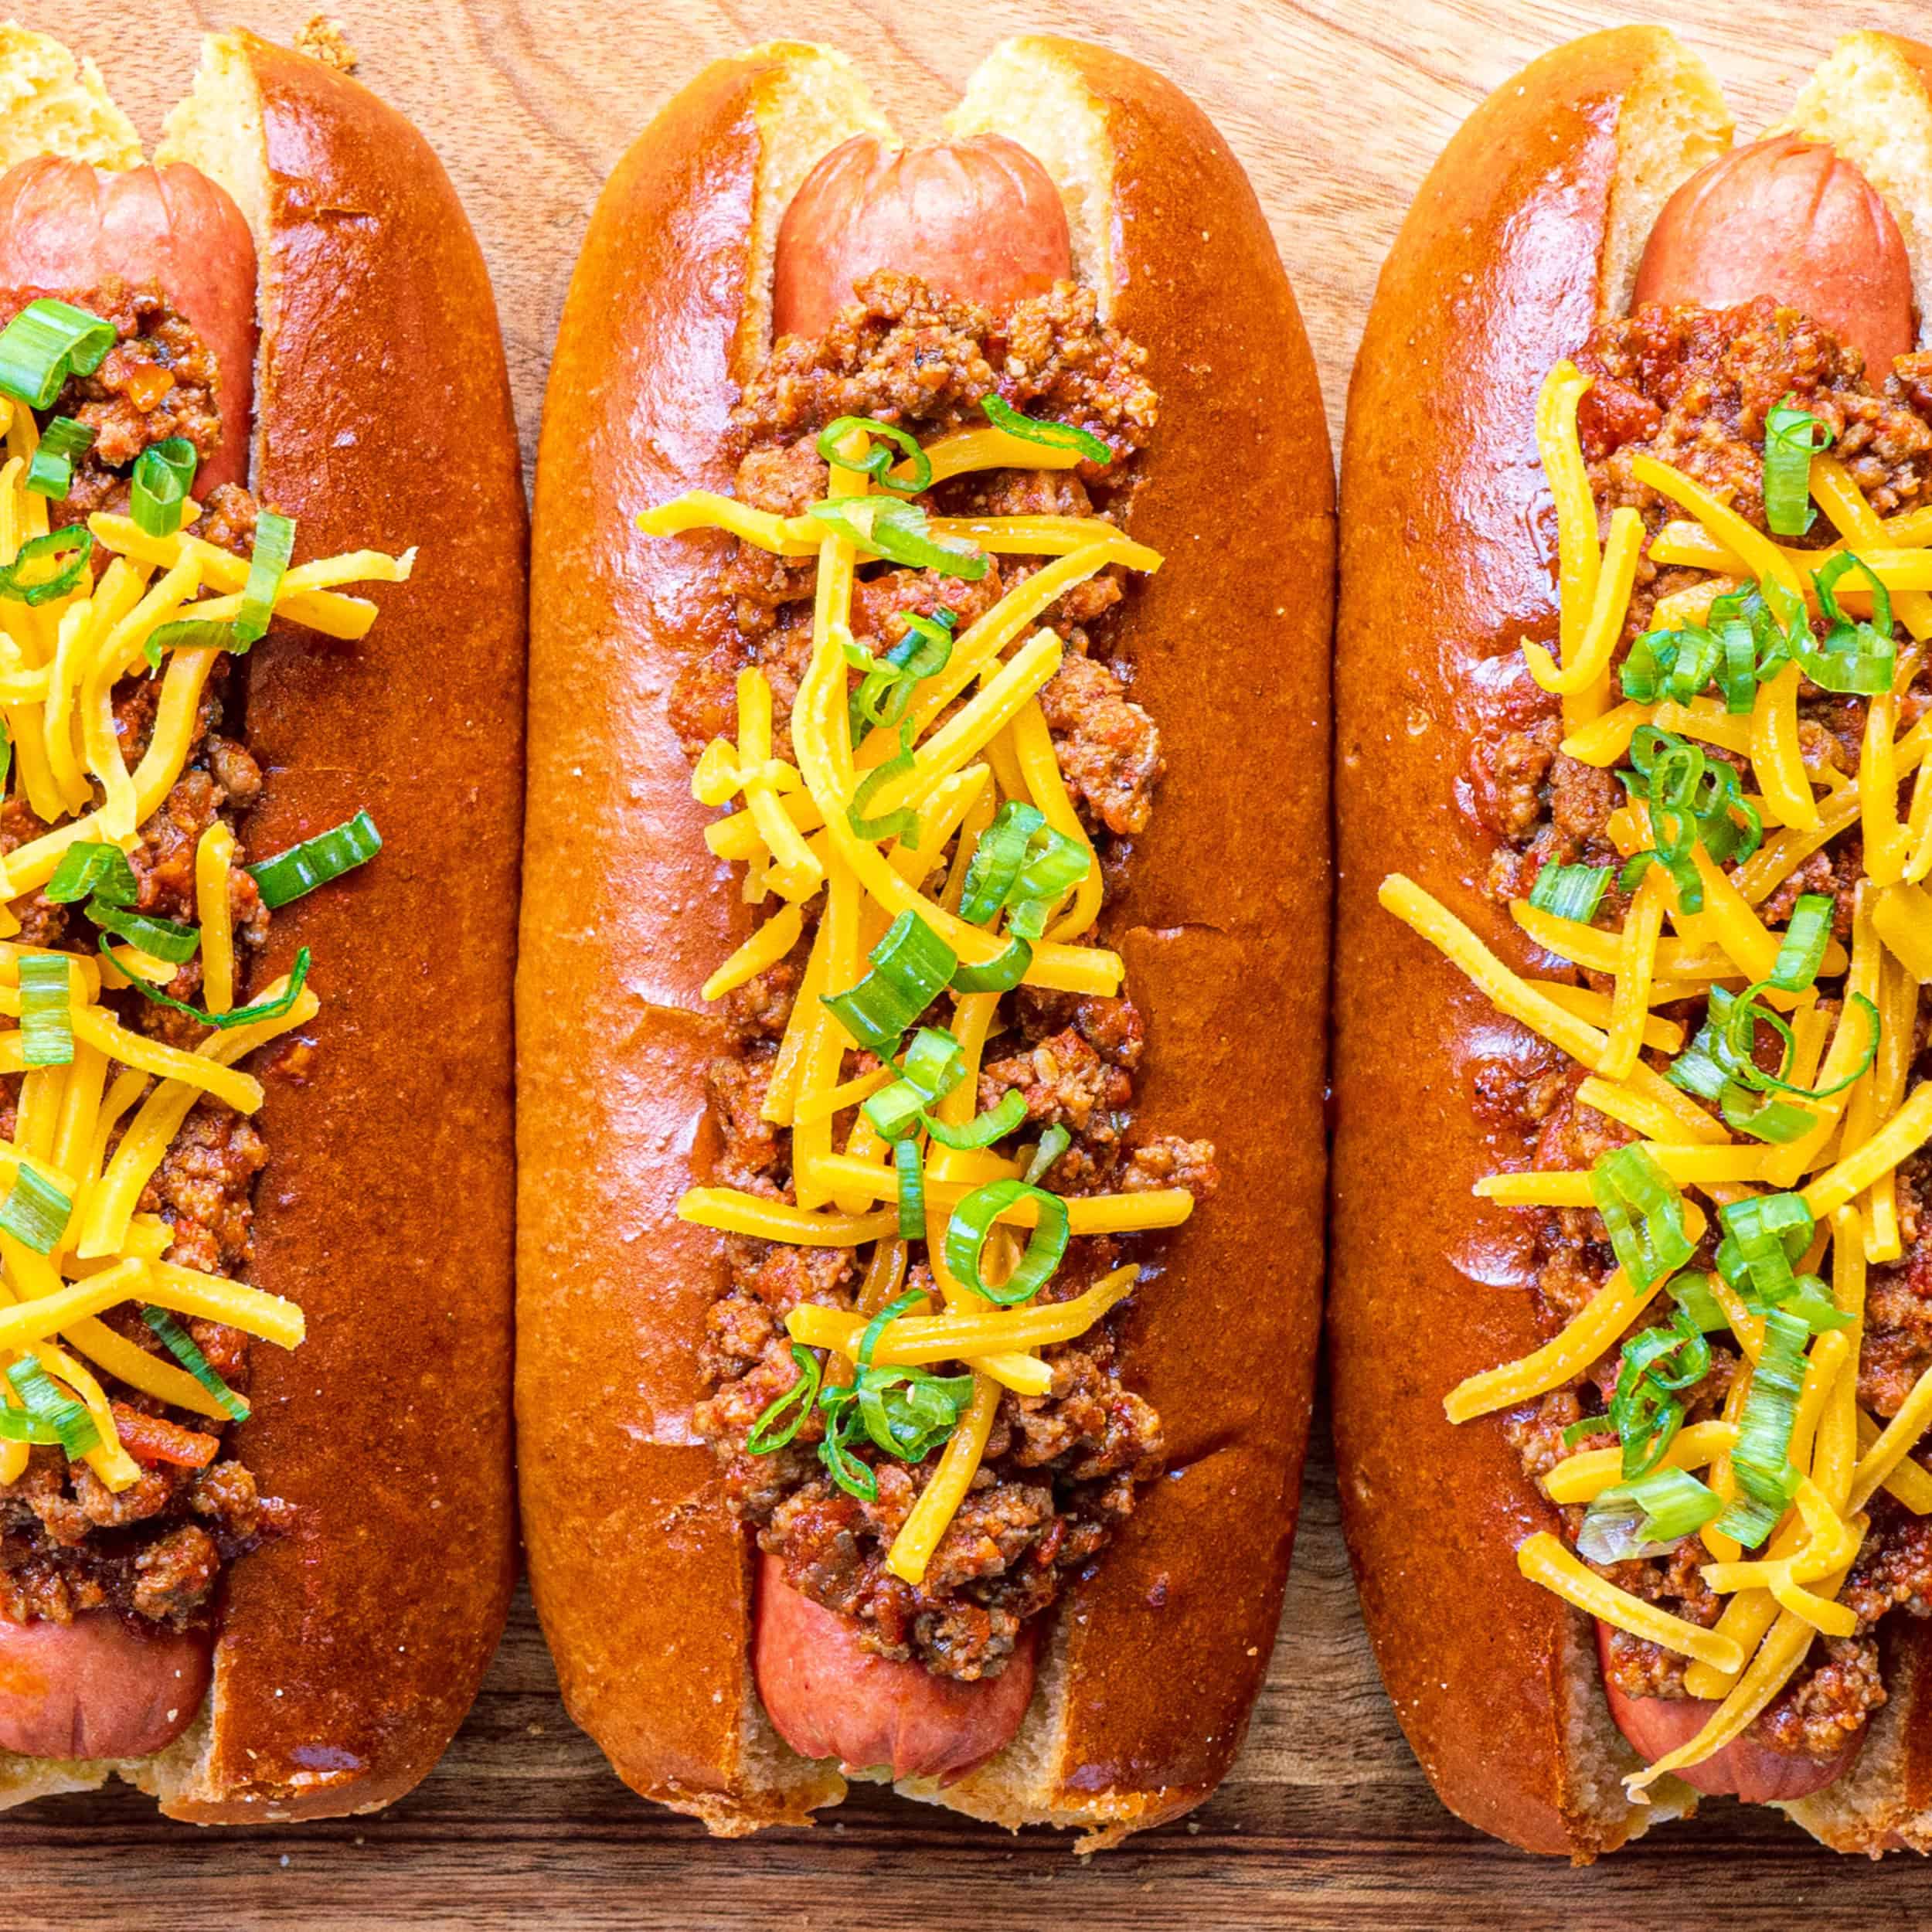
Woodfired Chili Cheese Dog
This is the woodfired chili cheese dog that converts the “chili dog is a stadium thing” crowd into people who make chili dogs at home. Beef chili built on Kinder’s Woodfired Chili Seasoning, ground beef, kidney beans, diced tomatoes, one packet of seasoning, gets simmered down thick, ladled over a grill-charred hot dog in a toasted bun, and finished with sharp cheddar and green onion.
Stadium food rebuilt at home, which our grilling recipes do whenever they get the chance.
The Woodfired Chili Seasoning is the whole reason this chili tastes like it sat on the stove all day instead of 30 minutes. Chile, cumin, garlic, smoked woodfire notes, it’s a full spice pantry in one packet, already balanced. You season the beef, add liquid and beans, and the chili gets its depth from the seasoning, not from you babysitting a pot.
The technique matters too. This is a woodfired chili cheese dog, not a bowl of chili with a hot dog dropped in. That means the chili simmers longer and reduces harder than a regular bowl chili, thicker sauce, less run-off, so the bun holds together for more than two bites.
The hot dog gets scored lightly and grilled over direct heat until the skin pops and blisters. Cheese goes on the chili while it’s hot so it melts into the ladle. Onions go on last.
These are Woodfired Garlic and Woodfired Chili family, same smoky backbone as the Woodfired Garlic Birria Tacos, different lane. This one owns game day and the backyard cookout.
Flavor First.
Woodfired Chili Cheese Dog
Ingredients
Equipment
Method
- Make the Chili:
- Brown ground beef in a medium pot over medium-high heat for 7-10 minutes, breaking it apart as it cooks. Drain excess fat.
- Add Kinder’s Woodfired Chili Seasoning and stir to coat the meat evenly. Cook for 1 minute.
- Pour in water or broth, undrained diced tomatoes, and kidney beans. Stir to combine. Bring to a boil for 3-5 minutes.
- Reduce heat to a low simmer. Cook for at least 30-45 minutes, stirring occasionally, until the chili thickens and flavors deepen. The longer it simmers, the better it tastes.
- Grill and Assemble:
- Preheat grill to 400-425 degrees F. Using two-zone heat (direct and indirect), grill hot dogs to your preference — about 2-3 minutes on the direct side until skin is lightly charred and blistered.
- Toast buns cut-side down on the grill for 30-60 seconds if desired.
- Place each hot dog in a bun. Ladle a generous spoonful of Woodfired Chili over the hot dog. Top with shredded cheddar cheese and sliced green onions. Serve immediately.
Nutrition
Notes
- ### For the chili
- Simmer uncovered, not covered. The whole point of the long simmer is that the liquid reduces and the chili thickens. A lid traps steam and keeps the chili loose — fine for bowl chili, wrong for bun chili. Crack the lid or leave it off.
- Reduce past “saucy.” If the chili still looks like soup at 30 minutes, keep going. You want it thick enough that a ladle holds its shape on the hot dog instead of pooling in the bun.
- ### For the hot dog
- Score the skin, diagonally. Three or four shallow cuts per side before the grill — not deep. The cuts open up over heat, catch more char, and stop the dog from splitting down the middle.
- All-beef dogs, full char. A pale, steamed-looking hot dog is the enemy. Keep it over direct heat until you see actual blister and snap on the skin. That’s the flavor note that carries through the chili.
- ### For the build
- Cheese twice, not once. A pinch of shredded cheddar on the bottom of the bun under the hot dog, more on top of the chili. The bottom melts into the bread and works as a moisture barrier against the chili. The top melts into the ladle.
- Split-top or brioche buns hold up. A standard side-load hot dog bun can collapse under a real ladle of chili. A split-top bun or a brioche hot dog bun has more structural spine for the topping load.
- This is the centerpiece of a game-day or backyard-cookout spread. Run the extra chili into a second round — spoon it over corn chips with more cheddar for a nacho station, or keep a warm pot on the counter for a build-your-own chili dog bar with mustard, diced white onion, and sliced jalapeño on the side.
- On the plate, go cold-side contrast: coleslaw or potato salad for crunch, pickles for acid, and something cold to drink — a lager, a Mexican Coke, or a margarita all work. For another Kinder’s Woodfired build on the same menu, the Woodfired Garlic Birria Tacos share the same smoky backbone and run on the same crowd.
- The woodfired chili cheese dog doesn’t assemble-and-store well — the chili is the part that keeps. The assembled dogs don’t.
- Chili: airtight container, up to 5 days refrigerated, or 3 months frozen. Reheat on the stovetop over low heat with a splash of water or broth to loosen it back up.
- Hot dogs: best eaten fresh off the grill. A leftover dog can be sliced into the reheated chili to make chili-mac or a chili-topped baked potato.
- Assembled dogs: don’t hold. The bun goes soggy within minutes. Build to order.
Tried this recipe?
Let us know how it was!Frequently Asked Questions
What kind of hot dog works best for a woodfired chili cheese dog build? An all-beef dog with a natural casing is the move, the snap carries through the chili. Skinless dogs work but lose the textural contrast. Polish sausage or bratwurst work as variants if you want more heft, but they’ll change the ratio of meat-to-chili in the bun. For this recipe, a standard 6-inch all-beef frank is the sweet spot.
Can I make the chili ahead of time? Yes, and the chili is actually better on day two, the flavors deepen overnight. Make it up to 3 days in advance, cool, and refrigerate. Reheat on the stovetop over low heat with a splash of water or broth to loosen, then grill your hot dogs fresh when you’re ready to assemble.
What else can I do with the leftover chili? The recipe makes enough chili for 6–8 dogs, but it’s intentionally a little generous so you can double-use it. Spoon it over corn chips with cheese and jalapeños for Frito pie, ladle it onto a baked potato, or stir it into mac and cheese for chili mac. It also works as a nacho base with shredded cheddar, sour cream, and pickled jalapeño.
Can I make this gluten-free? The chili itself is naturally gluten-free, check that your beef broth, canned beans, and diced tomatoes are all GF-certified (most are, but verify the brand). The bun is the issue. Use a certified gluten-free hot dog bun, or skip the bun and serve the dog and chili in a bowl over corn chips or rice. Verify Kinder’s Woodfired Chili Seasoning GF status before tagging the recipe GF.
What if I don’t have a grill? Sear the hot dogs in a dry cast-iron skillet over medium-high heat for 3–4 minutes, turning often, until the skin blisters. You won’t get the same smoke, but you’ll get the char. Toast the buns in the same skillet, cut-side down, for 30 seconds. Don’t boil the hot dogs, you lose the whole reason this is a woodfired chili cheese dog and not a regular one.
Can I use a different chili recipe? You can, but the whole recipe is built around Kinder’s Woodfired Chili Seasoning, that’s where the “woodfired” in the name comes from. Swap it out and it’s a regular chili cheese dog. If you’re using leftover chili from another recipe, thicken it down hard before you ladle it onto a bun.
More like this: Game Day Recipes
One Good Recipe a Week
No spam, no life stories. A recipe worth cooking, in your inbox.