Cheesy Chicken Nachos

Cheesy Chicken Nachos
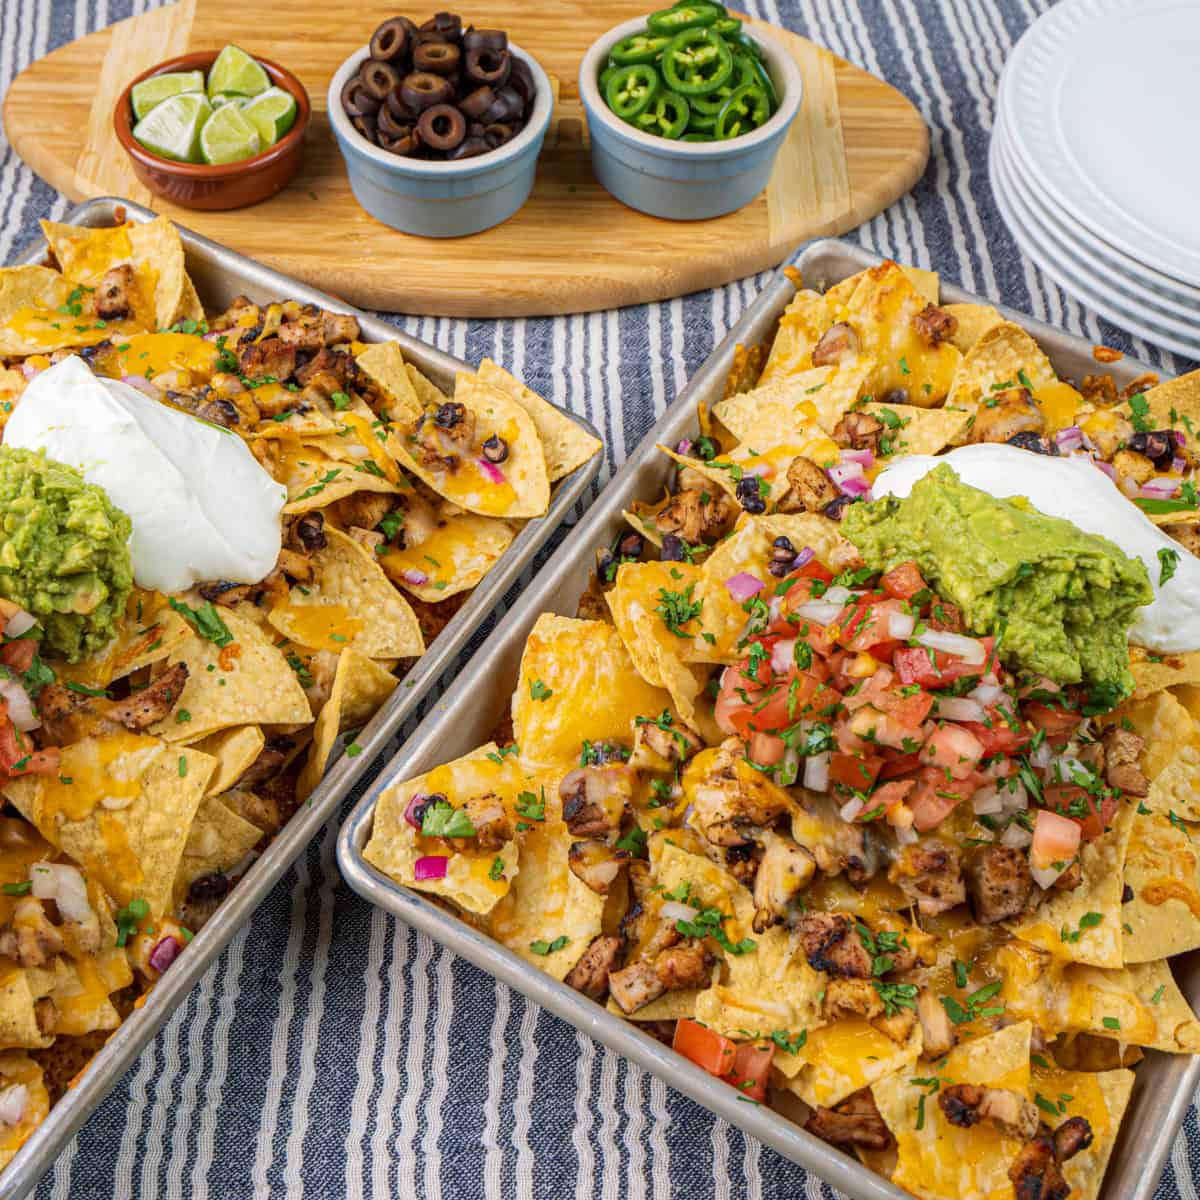
Cheesy chicken nachos that don’t go soggy, built on the only layering order that actually works. Grilled chicken gets rubbed with Kinder’s Chicken Taco Mexican Seasoning, shredded fine, and stacked over tortilla chips with shredded Mexican cheese and black beans. Twelve minutes in a 400-degree oven and the cheese sets into a seal around each chip, locking the toppings in place instead of soaking through. Sour cream, cilantro, red onion, and optional jalapeno and avocado go on after the pan comes out, not before. Thirty-five minutes start to finish, serves 4, and every chip lands loaded. Cheesy chicken nachos like these can headline dinner, no apologies needed.
Layering order decides whether nachos go soggy, one of the small rules in our grilling recipes.
On the chicken, Kinder’s Chicken Taco Mexican Seasoning provides all the flavor you need. The pre-measured packet carries warm spice and chili-forward heat that caramelizes on the grill and reads through every bite after the nachos come out of the oven. No measuring, no building a spice rack’s worth of jars for one tray. Swap in a dry rub of your own if you have one you trust, but a single packet is the fastest path to chicken that tastes built for this.
This tray of cheesy chicken nachos serves 4 as a full meal and 6 to 8 as a shared appetizer, and 35 minutes covers grill, rest, shred, and bake. Weeknight-fast with enough presence to anchor game day, movie night, or a Saturday spread where the nachos are the whole plan.
A few things worth knowing before you start. Cheese is glue, not garnish, it goes down before the chicken and beans, not on top. Cold toppings go on last, after the pan is out of the oven. Skip both of those rules and you get a wet pile of chips in ten minutes. Do them right and every chip holds its load from the first scoop to the last one.
“Chips, then cheese, then the heavy stuff, the cheese melts into a seal and the chip underneath stays crunchy. Reverse the order and you’re eating mush.”
Flavor First.
Cheesy Chicken Nachos
Ingredients
Equipment
Method
- Preheat the grill or grill pan to medium-high heat.
- Coat the chicken with cooking oil, then sprinkle Kinder’s Chicken Taco Mexican Seasoning evenly over all sides and press gently to adhere.
- Grill the chicken over direct heat until cooked through and the internal temperature reaches 165 degrees F, about 6 to 8 minutes per side depending on thickness.
- Remove chicken from the grill and let rest for 5 minutes, then shred using two forks.
- Preheat the oven to 400 degrees F.
- Spread tortilla chips in an even layer on a large rimmed baking sheet. Top evenly with shredded Mexican cheese and drained black beans, then scatter the shredded chicken over the top.
- Bake for 8 to 10 minutes until the cheese is melted and bubbling.
- Transfer to a serving platter or serve directly from the pan. Top with sour cream, cilantro, and diced red onion. Add jalapeno slices and diced avocado if using. Serve immediately.
Nutrition
Notes
- Layer in this exact order: chips, then cheese, then chicken and beans. The cheese has to touch the chips first. When it melts, it forms a thin seal on the chip surface that blocks moisture from the chicken and toppings from soaking through. Reverse the order and every chip on the bottom turns to mush before you hit the middle of the tray.
- Build a two-layer tray for full coverage. A single layer of chips leaves you with bare chips on the edges and an overloaded middle. Spread half the chips, half the cheese, half the beans, half the chicken, then repeat. Every chip gets a topping, not just the ones on top.
- Pull the chicken when the thermometer reads 165°F — not by eye. Grilled chicken breast goes from juicy to stringy in under a minute at this heat. An instant-read thermometer in the thickest part is the only way to pull it at the right moment. Rest it 5 minutes before shredding so the juices set back into the meat instead of onto the cutting board.
- Shred the chicken fine, not in chunks. Two forks, pulling apart along the grain. Smaller shreds spread across more chips — chunks concentrate on a few and leave the rest dry. Fine shreds also reheat faster under the cheese, so everything melts together instead of staying cold in the middle.
- Melt at 400°F for 8 to 10 minutes — watch for the bubble, not the clock. The cheese is done when it’s fully melted and just starting to bubble at the edges. Pull it before it browns. Browned cheese gets rubbery as it cools, and rubbery cheese is the second-biggest reason nachos go wrong after bad layering.
- Cold toppings go on AFTER the pan comes out. Sour cream, avocado, cilantro, red onion, and jalapeno all hit the nachos on the table, not the oven rack. Baking fresh toppings kills the color and wilts the cilantro; the cold-hot contrast is half of what makes a loaded nacho tray work.
- Make-ahead: grill and shred the chicken up to 2 days early. Store it in an airtight container with a splash of its own resting juices to keep it from drying out. Reheat in a skillet over medium for 2 minutes before assembling. Don’t pre-assemble the full tray of cheesy chicken nachos — the chips will soften in the fridge before they ever see the oven.
- Cheesy chicken nachos reward a strong supporting cast. Set out pico de gallo, fresh guacamole, and a hot sauce lineup alongside the tray so guests can dial up heat and acid to taste. A chopped salad or fire-roasted corn on the cob rounds it into a full dinner instead of a snack. For a party, run two sheet pans in parallel and stagger them out of the oven — the second pan lands right as the first one empties. Cold Mexican lager with lime, a classic margarita on the rocks, or sparkling water with a squeeze of lime all pour alongside easily. Keep a stack of small plates handy — loaded nachos eat better off a plate than a palm.
- Leftover cheesy chicken nachos are a different animal than fresh — plan for it. Pull the shredded chicken off the tray and store it separately in an airtight container for up to 3 days. The baked chips with cheese and beans can go in a second container for up to 2 days, but expect the chips to soften significantly.
- To re-crisp the chip base, spread it on a sheet pan and bake at 375°F for 8 to 10 minutes. For the best leftover version of cheesy chicken nachos, assemble a fresh tray with new chips and the reheated chicken — 5 minutes in the oven and you’re back to day-one texture. The USDA has straightforward guidance on safe refrigerator windows for cooked chicken if you’re stretching the window.
Tried this recipe?
Let us know how it was!Frequently Asked Questions
How do I keep nachos from going soggy?
Build in layers, not piles. Chips, cheese, chicken, then repeat, so every chip gets a cheese seal before anything wet lands. Cold toppings like tomato, crema, and guacamole go on after the bake, never before. Serve straight off the baking sheet while everything is hot; nachos are not a make-ahead dish.
What cheese melts best for nachos?
Shred it yourself. Bagged shredded cheese is coated in starch that keeps it from melting smooth. A 50/50 mix of Monterey Jack and sharp cheddar covers both melt and flavor. If you want pourable queso, make it separately; baked cheese and queso are two different nacho schools, and both work.
Can I use rotisserie chicken for these nachos?
That’s the move. Shred it, warm it in a skillet with the seasoning and a splash of water so it doesn’t dry out, then layer as directed. Ten minutes saved, and the seasoning goes deeper than a rushed saute.
What goes on top after the oven?
Anything cold or fresh: diced tomato, sliced jalapeno, cilantro, a drizzle of crema, guacamole if it’s game day. Keep wet salsa on the side for dipping so the chips stay loud to the last one.
More like this: Game Day Recipes · Appetizer & Dip Recipes · Chicken Recipes
One Good Recipe a Week
No spam, no life stories. A recipe worth cooking, in your inbox.